I began reading Dave Burgess' Teach Like a Pirate tonight and am inspired already.
It inspired me to sail the ship of my classes further into 21st century learning.
At the end of every semester I do a report card for myself where students are asked to anonymously rate the class and answer some very specific questions about both my pedagogy and about the creative decisions that went into the course they just participated in.
Today I want to do a quick review of the first of those surveys and what I will do doing to enhance my courses for next semester. Robotics Introduction
This course was taught differently for me this year as I went from a cap of 28 students to an actual list of 38. We were committed to covering the following topics.
The first four modules were covered using a station-rotation method where students spent two and a half weeks at a station before shuttling to the next one.
In my opinion, this method was good given the challenging situation of 38 students in the room. It could be improved for next semester by reducing the rotation to two groups and having students partner up. This came through strongly in the survey where student told me they wanted to work with partners to help them understand the ideas. I agree with this completely and will be implementing it next semester.
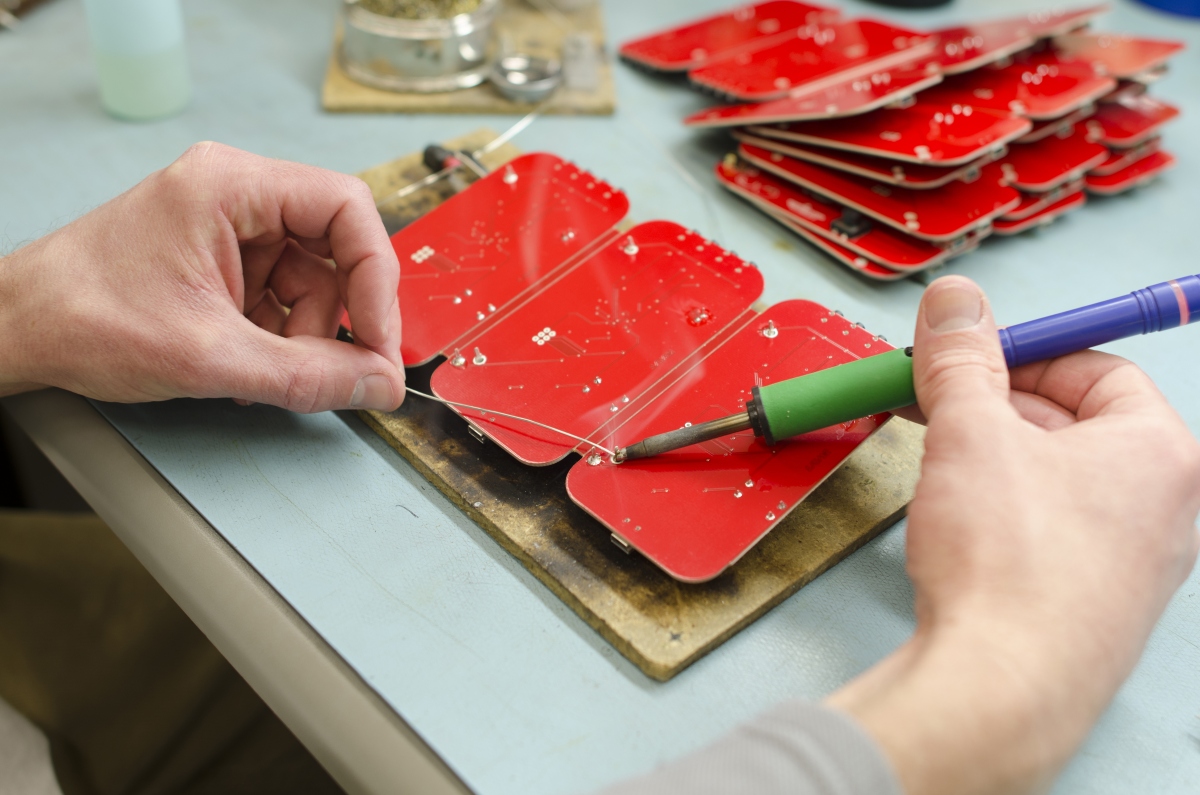
Electrical Theory, Safety, Soldering
from learn.sparkfun.com
This unit saw students learning to solder and practicing this talent while also practicing lab safety and working on learning basic electrical theory such as breadboards, resistors and capacitors.
I believe that this unit worked well overall as the hands-on assignments were effectively completed Unfortunately, there was a severe lack of devotion to the theory piece of this module which will need to be rectified in the future.
The student response mirrored this and one student requested that a booklet that followed the concepts with more hands-on tutorials would be more beneficial. It will be added for next semester.
One of the interesting pieces I find with anonymous surveys, in addition to students telling you to "quit teaching and find a new career" occasionally, is that some students have a sense of humor. This time around I got a fairly significant passage from Fifty Shades of Grey...charming.
Takeaway - Tutorials activities that better frame the electrical theory.
Basic Electropneumatics
from festo-didactic.com
Our electropneumatics module is taught using a FESTO Didactic training system that has the worst documentation a high school student could imagine.
It lays our part theory and then demonstration circuits to show how to make them work.(much like Electrical theory will soon have)
The module has five sections and students are graded on how much of the booklet they can complete during the semester(usually about 10% of students complete the whole set of five while most of the class gets four done.(worth 80-90% on our somewhat archaic grading system).
Interestingly the students found this unit both challenging and fulfilling. They suggested minor edits to some activities, but no major structural problems.
Takeaway - Using Project learning and modern blending strategies works.
CAD Basics
from AutoDesk.com
Of all of my high school courses, AutoCAD is one of those that I remember very vividly, despite not taking it past tenth grade.
This module is based on learning CAD concepts to recreate a series of 2D drawings that use those concepts.
Unfortunately, AutoCAD is not intuitive and so many students struggled. One student did suggest the solution during the unit, not on the report card. She said that we should be working on a real-world project. I want to improve this module further by making it real world and integrated as a unit.
Takeaways - Revamped unit with renewed focus on drawing real-world objects(also how to sue measuring devices) and an overarching purpose for the unit. Design multiple parts for the same object.
Coding Basics
Personally, I consider this module to be the low-point of the semester for me pedagogically, as my learning resources fell flat for this group.
I've been fighting with how to most effectively teach
from Instructables.com
coding to neophites in the area and have started using CODE.ORG's 20-hour course as the best starting point, but I find that students have difficulty transferring this block-coding to Arduino's test environment.
I hated how this unit went so much that I started from scratch and did it again later in the semester.
For the second attempt, we did a major project where students created a blinking lights game.
The game made them create an Arduino controlled solder-board with a blinking LED game.
I will place a rundown of that project on this blog in the future.
After the second attempt, the feedback from the students was incredibly positive. We will be doing this again.
Takeaways - Guiding final project + process-focused lessons = success
Robotics Competition
For the final competition we will be doing a balloon battle. You've already seen the prototyping of this project on this blog and a summary post will follow shortly after the competition on Friday.
This post is inspired by the fantastic conversation generated by the #EdChat #ABEdChat on twitter tonight.
As a preface, I have never participated in an EdChat before, preferring to be a passive observer(for the most part) on Twitter.
Today we talked curriculum. In my mind, curriculum is our guiding document for all classes; this opinion has been echoed by many of the multitude of principals I've had the pleasure of working
under over the last five years.
The conversation, as I entered it, was talking about flexibility in curriculum and whether Alberta's curriculums allow for flexibility in how they are delivered.
The last time I checked, life is dynamic not static. Curriculum & teaching as a whole should be the same. #abedchat
I agree with Chris on this and it has a lot to do with my view on 21st century teaching methods and how they tend to resonate with students and encourage learning.
There were, and always, are those who follow this with the difficulty of finding change in institutions as firmly entrenched in their ways, such as school boards.
@backcountrynut@cdsmeaton A truly dynamic learner centred curriculum would require a lot of disruption in how we view teaching #abedchat
As I see it, the problem with a curriculum that can be interpreted as static and content based is that it can change the culture of a teacher`s practice irreparably.
I am, admittedly, educated in 21st century teaching methods by training, but found them challenged by my colleagues frequently in these first five years.
"I would love to try an inquiry project, but I have all of this content to cover."
"I want to do things like blog, but I don't know how they work."
"I want to use technology, but it usually doesn't work."
If you work in a Kool-Aid factory you are bound to drink some eventually.
Now I have been fortunate in that my 5 year career has spanned four different schools as well as substitute teaching for four months. When you see that many buildings you start to appreciate that not all school cultures are made equal when it comes to innovation.
Seeing these environments has also allowed me to make up my own mind and choose to innovate and challenge myself to risk failure in all of the classes I teach.
The frustration comes in seeing it end there. This is not always the case, but when it is the feeling can be defeating enough to make you want to put your time to better use outside of teaching.
Sometimes innovation in your own room can be amplified within your school and can cause larger scale change, but often it ends at your door. What is stopping teaching from building entrepreneurial spirit, innovation and technology into the curriculum that we base our practices on? Why can traditionalist, Luddite teaching methods be defended with a document that outlines our practice?
So I pose the question, what would a truly flexible curriculum look like? Could we create something that could be used as the refuge for new teachers, like myself, to fend of the textbook hounds and traditionalist parents who we are invariably forced to interact with in our formative teaching years, and to hold up in defense of 21st century teaching techniques that work for 21st century learners?
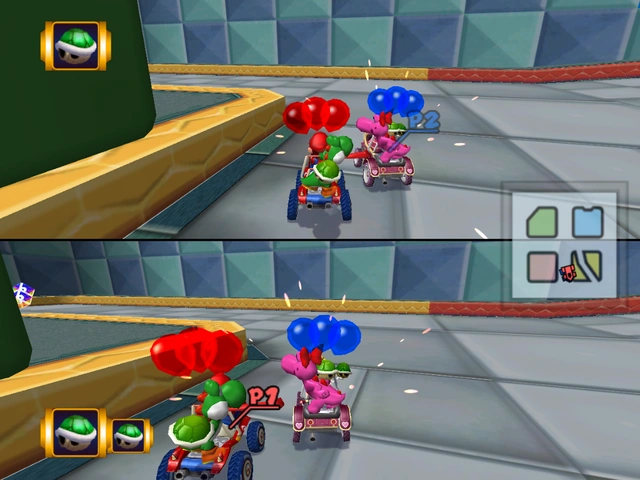
Like many tech-slanted children of the nineties I have many fond memories of some classic video games.
Mario Kart 64 was one such game.
It was a fantastic example of simple, well thought out design meeting pure simplicity of gameplay...except for the blue shells...those terrible, terrible things.
And while cruising Rainbow Road was a certain sort of cathartic, it was always the balloon battles that got the shouting started and the players ready to splatter each other into the wall.
Which leads me to my next problem. Admin has challenged me to present something about robotics at our club week and it was suggested that it should be interactive.
And I asked, "what would it take to do a real life Mario Kart balloon battle?"
Apparently, according to Rooster Teeth, it requires mild to severe inebriation, a budget for robots and a lack of love for your baseboards and your ankles.
I pitched it, jokingly, to my Assistant Principal. He responded as any sane person would..."knives ..in a school?...seriously?"
I wasn't serious about the knives, but I was serious about the balloon fight. So here is the plan.
A) Create 2-4 robotic platforms that will be challenging to drive.
B) Attach balloons to one end and sewing needles to the other
C) Have students battle them to the death.
This post will cover A.
For this project I used the following supplies:
Arduino Uno (I used Sparkfun's Redboard for the prototype but am going to test Solarbotics' Sketchboard as well.) Magician Chassis
Breadboard (all of the chassis in my classes have breadboards stuck on them for prototyping)
RC Car 9.6V Battery(pictured right - The ones I have were there when I inherited the lab and will be replaced this year as they are dying) TSOP4038
A Toy IR Remote Control(This bad boy cannot be found online. It is cheap, probably Chinese, and irreplaceable. They were a part of a kit and I can't find the kits. It has 8 channel IR transmission and 8 buttons.) Seeed Studio's I2C Motor Driver
The Magician chassis is perfect for this as it has high speed motors and is easily adaptable.
I hooked up the I2C Motor Driver into the Arduino according to my I2C lesson(see right panel for Arduino Theory Lessons from my class). One problem that I noted was that the Uno R3 (the official Arduino ones) don't have labelled SCL and SDA ports. Can anyone confirm if the unlabelled ports above the AREF port work for this application?
The main hack here is that I used a 4-pin adapter for my Motor Driver instead of a Grove Shield. This is much more cost effective if you aren't using the rest of the Grove system.
The second piece of this was to wire the IR receiver into the breadboard according to it's datasheet.
At this point the electronics people reading this are asking, "why is nothing tied down?" I was testing, we will get to that.
With all of the hardware in place, I was able to tackle the hardest part, the code.
Let me start my saying that I am not a trained coder, I am self taught and began in PBASIC with Parallax robots.
Needless to say, my code often looks different than the standards for C.
Using the IRrecvDemo I manually recorded the sensor values for each of the buttons. They all come in hex code which was noted as I will need to explain how hex works to my kids if we do this as a projects this year.
Following this I fired up my DC motor test code, which can be found in the right panel under Arduino Theory.
After confirming that it ran the motors properly I created a series of functions to simplify calling moving forward, back, left and right pivots and swerves and three different speeds.
These functions were than applied to a series of if and else...if commands to connect them with each button press
I spent two evenings fighting with datatypes as C is something that I am learning at this point. In the end though, it is like winning on rainbow road when you press the buttons and the robot responds to your commands.
I've posted the code below and will place it in the Arduino Programs section of the sidebar. (video of the first run is at the bottom of the page)
1: /*
2: Grove- i2C motor driver demo v1.0 Modified for James Fowler Robotics
3: by: http://www.seeedstudio.com
4: // Author:LG Modified by Mitchell Way
5: //
6: // The Modifications to this code serve to make it able to run 2 DC motors while being controlled by an Infrered remote
7: //
8: // This demo code is free software; you can redistribute it and/or
9: // modify it under the terms of the GNU Lesser General Public
10: // License as published by the Free Software Foundation; either
11: // version 2.1 of the License, or (at your option) any later version.
12: //
13: // This library is distributed in the hope that it will be useful,
14: // but WITHOUT ANY WARRANTY; without even the implied warranty of
15: // MERCHANTABILITY or FITNESS FOR A PARTICULAR PURPOSE. See the GNU
16: // Lesser General Public License for more details.
17: //
18: //
19: */
20:
21:
22: //Data to communicate with motor Controller via I2C
23: #include <Wire.h>
24:
25: #define MotorSpeedSet 0x82
26: #define PWMFrequenceSet 0x84
27: #define DirectionSet 0xaa
28: #define MotorSetA 0xa1
29: #define MotorSetB 0xa5
30: #define Nothing 0x01
31: #define I2CMotorDriverAdd 0x0f // Set the address of the I2CMotorDriver
32:
33:
34: #include <IRremote.h>
35:
36: //The following describes the controller outputs on setting 1
37: #define None 0x85EC7D0F
38: #define u 0x9ACDD255
39: #define d 0xEE228A5
40: #define l 0x28C6631A
41: #define r 0xE6DFAB16
42: #define ur 0x3FC4F8DA
43: #define ul 0x27C66187
44: #define a 0x5D30FCF1
45: #define b 0xA51DA0F
46: #define x 0x96A9455E
47: #define y 0x657C3134
48:
49: int RECV_PIN = 11; //TSOP4038 set up on Arduino Pin 11
50:
51: IRrecv irrecv(RECV_PIN);
52:
53: decode_results results;
54:
55: void setup() {
56: Wire.begin(); // join i2c bus (address optional for master)
57: delayMicroseconds(100);
58: irrecv.enableIRIn(); // Start the IR receiver
59: Serial.begin(9600);
60: Serial.println("setup begin");
61:
62: }
63:
64: void loop()
65: {
66: if (irrecv.decode(&results)) //When a nonzero value is read determine proper function to pursue based on button pressed
152: Wire.beginTransmission(I2CMotorDriverAdd); // transmit to device I2CMotorDriverAdd
153: Wire.write(PWMFrequenceSet); // set frequence header
154: Wire.write(Frequence); // send frequence
155: Wire.write(Nothing); // need to send this byte as the third byte(no meaning)
156: Wire.endTransmission(); // stop transmitting
157: Serial.println("MotorPWMSetAB");
158: }
159: //set the direction of DC motor.
160: void MotorDirectionSet(unsigned char Direction) { // Adjust the direction of the motors 0b0000 I4 I3 I2 I1
161: Wire.beginTransmission(I2CMotorDriverAdd); // transmit to device I2CMotorDriverAdd
162: Wire.write(DirectionSet); // Direction control header
163: Wire.write(Direction); // send direction control information
164: Wire.write(Nothing); // need to send this byte as the third byte(no meaning)
165: Wire.endTransmission(); // stop transmitting
166: Serial.println("MotorDirSetAB");
167: }
168:
169: void MotorDriectionAndSpeedSet(unsigned char Direction, unsigned char MotorSpeedA, unsigned char MotorSpeedB) { //you can adjust the direction and speed together
170: MotorDirectionSet(Direction);
171: MotorSpeedSetAB(MotorSpeedA, MotorSpeedB);
172: }
173:
174:
175: //This last section my seem inessecary but it is arranged this way for ease of student use.
176: void Forward()
177: {
178: MotorDirectionSet(0b1010); //FWD
179: }
180:
181: void Back()
182: {
183: MotorDirectionSet(0b0101); //FWD
184: }
185:
186: void PivotRight ()
187: {
188: MotorDirectionSet(0b1001); //Pivot R
189: }
190:
191: void PivotLeft ()
192: {
193: MotorDirectionSet(0b0110); //Pivot L
194: }
195:
196: void SwerveRight ()
197: {
198: MotorDirectionSet(0b1110); //Swerve R
199: }
200:
201: void SwerveLeft ()
202: {
203: MotorDirectionSet(0b1011); //Swerve L
204: }
205:
206:
207: void SpeedFull ()
208: {
209: MotorSpeedSetAB(100, 100); //defines the speed of motor 1 and motor 2;
210: }
211:
212: void SpeedMed()
213: {
214: MotorSpeedSetAB(50, 50); //defines the speed of motor 1 and motor 2;
215: }
216:
217: void SpeedStop()
218: {
219: MotorSpeedSetAB(0, 0); //defines the speed of motor 1 and motor 2;
220: }
221:
Part B will follow once I have laid out the game and have attached some sharp objects to the robots.
I was told today "You know that it's summer holidays right?" as I booked a field trip for one of my classes this year.
Which brings me to what I was doing today, laying out my Intermediate/Advanced Medical Studies Outline for the year.
The last bit is unfinished and I will likely need a few days of thinking about it to decide which credits I want to teach this time around.
Also, I get a set of damaged Roombas tomorrow. I will be posting my initial thoughts when I receive them.
Medical Studies Intermediate/Advanced Outline (WIP)
“Your body, your health, your career”
This course will be offered for those interested in a Healthcare career. It will be organized into the three themes above:
Your body: This course will act as an introduction to anatomy and physiology of the human body. This is also covered in Biology 20 and 30, but this course will seek to deepen students’ knowledge of these topics especially in how the apply to the human body.
Your health: The second theme of this course will focus on personal health and the choices that individuals can make to improve their own health and well-being. This will include personal studies into each student's health and interventions that can have a lasting impact on it.
Your career: There are a multitude of careers in medicine that students never consider. Many enter the area of healthcare assuming that it is only doctors and nurses, not knowing that the profession also includes paramedics, radiology technicians, occupational therapists to name just a few. This course aims to expose students to these other career paths as well as to shed light on the path to doing any profession in healthcare.
Credits offered:
CCS 1030: Caring for Body Systems 1
HCS 2020: First Aid/CPC C with AED
HCS 3050: Reproduction and Readiness For Parenting
HCS 3060: Pregnancy,Birth and Infant Care
HCS 2910: HCS Project B OR HCS 3910: HCS Project D
CCS 1030: Caring for Body Systems 1
In this unit, students will review concepts in Medical Studies that will assist them in the remainder of the course. This course will also be used as the foundational content knowledge for our semester-long project “The You Study.”
HCS 2020: First Aid/CPC C with AED
During this credit, an outside instructor will be welcomed to our class to certify all of the students in the class in Standard First Aid and CPR. This certification is recognized across Canada and is something that can be used on students’ resumes and professionally. The certification lasts for three years at which point individuals can re-certify with a short 8-hour course rather than this full 16 hour course.
Cost: $85 (This course costs $135 on average to take elsewhere)
HCS 2910: HCS Project B OR HCS 3910: HCS Project D
To earn this credit, students must successfully complete a semester-long project known as “The You Study” that will challenge them to study themselves physiologically before making a major change to their behaviour, lifestyle, or diet and measuring the results. They must carry out the study and then must present the results during the final week of the semester.
HCS 2120: Pain and Pain Management
HCS 3050: Reproduction and Readiness For Parenting
HCS 3060: Pregnancy,Birth and Infant Care
Two of the following three credits will be covered in the course. I received overwhelming support for doing a unit on pregnancy and childcare in my end-of-year survey last year and this is where the 3000 level courses come in. The 2120 course is appealing to me because I am planning to take this group on a field trip to Telus Spark’s Direct from the Operating Room Program.
These will be updated as I make a decision on what to do about them.
One of the most loaded questions that you are asked as a teacher during the summer is "what are you doing this summer?"
en.wikipedia.org
The answer, depending on how you respond, is either used to reinforce someone's view about the general laziness of teachers or to reinforce their view that you are a sadistic workaholic who can't appreciate your time off.
In short, answering the question is a trap and you should simply avoid the question if you want to see the people you are talking to again without any sense of resentment.
During our tinkering session today with the Arduino based robots one of the other teachers there pointed something out that I already knew but hadn't thought about recently.
"Often, especially in junior highs, a teacher is handed one period of robotics or applied technology as an afterthought. This wouldn't be a problem except that as that teacher I now need to sink a ton of time into learning and developing this stuff that I may only use once."
A part of what I am putting together is aimed as an entry-level Arduino course that educators can use to begin an Applied Technology or Robotics program quickly.
I say quickly because our conversations at these sessions came back to inquiry and project based learning again and again. For those not paying attention to the current education system, we have produced a generation of kids that appear lazy and entitled to the outside world. In fact, what we have done is empowered these kids to not just ask what they are doing today, but why they are doing it.
To this end, we have to look at task and instructional design differently because very often there are other people doing what we do far better than we are doing it as educators. Which brings us to the problem of the internet and why we need an education specific sandbox for Arduino that educators can plug-and-play.
hyerboleandahalf.blogspot.com
I was lucky enough to have an education that straddles the internet divide, that is the point in time where the internet left the hands of the early-adopter and entered the mainstream to decimate the Encyclopedia Brittanica and make poorly written cat pictures a part of our collective consciousness.
In straddling this divide I went from the problem of "where can I find that?" to the problem of "What parts of this can I ignore so that I get what I need?"
When designing instruction in this age, the focus should be on an end-game where we release the students into the world to do something relevant with what they have learned or else structure the task within something relevant to the student's lives so that they learn via collateral-damage.
In the robotics world this is simple because we can easily structure a robot-build around any number of real world premises and then hand the students some basic tools and let them choose what is relevant to their particular project.
On a side note, I find this this last statement scares many educators. It implies that the teacher is no longer the centre of the class that manages big ideas, but instead they become a technician that uses a structured a challenge and troubleshoots the small problems that arise from inattention, limited foundation skills or technical problems(three problems that send teachers into fits of rage in my experience).
wikimedia.org
I'm in the process of revamping my basic electronics assignments which come in Google Form flavour to address the foundational skills in electronics. Would I be happy if they are never used as a part of a major project? Sure. Would I expect that a student should look to that smaller pool of knowledge before the ocean of the internet? Also yes.
If anyone reading this has found a plug and play Arduino curriculum, please post where it is below. I know that many introduction courses exist, but I find that they aren't aimed at absolute beginners in that they introduce too much superfluous information too early. My goal is to have something basic that can get students rolling quickly so that they can return to more theory later once they have a taste of success.
Today I had the pleasure of attending / helping to host a session about Arduino as put on by my friends at Solarbotics.
These guys do awesome work in both supporting the local Robotics/Electronics community in Calgary (among other places) as a supplier and as an educator. I have had many trips out there to make sure that a piece of hardware or concept that I was using were being used correctly.
For all of you aspiring or prospective educators, check out their well built and cost-effective Sketchboard for Arduino fun.
Today's session allowed me to test out some of the Arduino Theory presentations with a couple of beginners and a couple of experts.
To no one's surprise, the experts found some holes in what I had created and the beginners found some errors in the presentations as well. Those holes have been fixed in Arduino 01-04.
What I took away from it is that even at my stage of being very new to this system I come with some assumptions including how a breadboard works. This is something that is very simple but that could throw a beginner for a loop. the main problem this illuminated was that the earlier units in my course this year are going to need to be slightly longer as I may need to sneak in some foundational skills from one area, such as breadboarding, into units where they don't explicitly belong, such as programming.
For anyone not aware of how a breadboard works, Colin Cunningham has one of the most informative lessons on them through his Collin's Lab Series on YouTube.
With this being the case and my programming module being at a place where I can leave it, until the robotics project credits at least, I am going to tackle these electronics lessons next. Luckily, those were some of my more well developed assignments and sections so revamping them for 2015/2016 should be relatively simple.
This event was also a lesson that reminds anyone developing curriculum and lessons that your assumptions are invisible to you. Nothing is as humbling as watching something that you created to be simple and self-explanatory need significant explanation.