Monday, July 27, 2015

On Assessing Real World Skills

A significant amount of the current educational rhetoric has been focused around the idea of teaching real world skills to our students rather than institutional skills that are important for school.

I phrased this early in teaching school by asking the question, "is school a place for learning key skills or for social normalization."

I always found it cynical when I didn't receive a clear answer so I've always tried to shift my focus from the latter to the former.


To this end, our department has routinely used a work habits and employability rubric to assess our students and in accordance with 21st century learning, we also ask students to have a (rather significant) role in assessing their progress. While frequently a sore spot in your Gluteus Maximus, the information gathered by these type of activities has frequently allowed me to refine and develop my own teaching practice.

Image from


The rubric itself can be found at http://goo.gl/forms/dH4jPr4KE7 and any teachers reading this can feel free to email me if they want access or their own copy of this rubric. I have been an early adopter of Google Drive and I find the data collection power of Forms to be excellent.

If you choose to use this kind of rubric, you will need to trust that students are being honest about their names; in our district we have district email accounts that are automatically recorded if the Form is set up correctly.

The rubric clearly states what is expected of students and while some parts, such as attendance, are as institutional as they are practical (especially in creative or knowledge career fields), the rest allow students a peek into what is valued in the real world, especially that of technology.

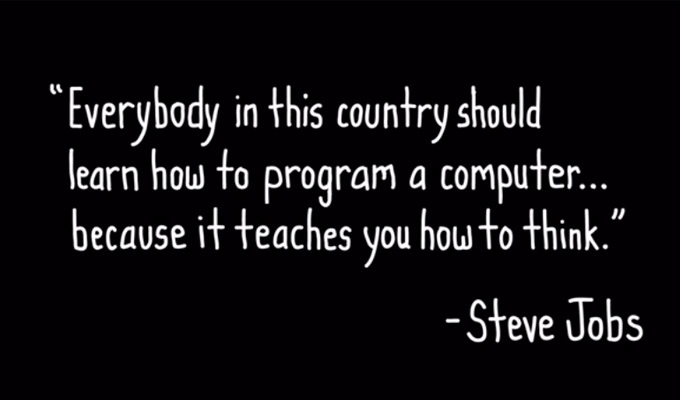
The joy of jumping into the water of assessing real world skills, especially in technology, is that we can begin to modify and redefine what the tools we are teaching and using to teach mean, because we are less constrained by the expectations of a traditional teaching expectation. See the graphic on the right for the most succinct analysis of this effect that I have run across.

The most important part of that rubric is the Peer Support section in my opinion. This portion comes with a story from me because I have experienced this peer support early in my teaching career and I credit it with keeping me going through the rough early years of a teaching career.

The way peer support helped me was, as far as I know, through serendipity. During my first full year teaching contract I was tasked with teaching a full year of English as a replacement for a long-tenured teacher who had gone on disability leave for health reasons. This contract eventually branched out into Phys Ed and Robotics but not before I realized that I had the best classroom in the school. The school was built as one C-shaped hallway that encircled the library. Many of the classrooms, including mine, were attached to the library; but my room had the distinct advantage of being the perfect shortcut, being attached the the PE hallway and the library, to avoid one frequently locked door to the library (and therefore the photocopier).

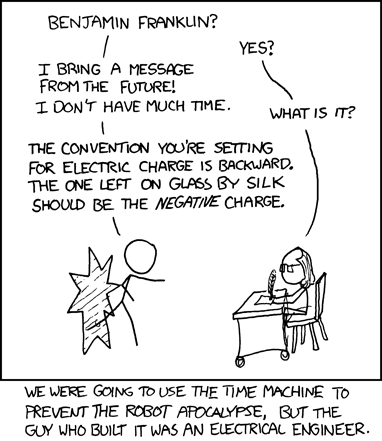
This gem from theoatmeal.com is essential reading for all teachers.
Even those of you who claim to not be caffeine dependent.
It is important to note that I made a conscious effort to invite people to use my room as a highway into the library early in my year there. This veritable tide of people who wandered through were a great source of inspiration, motivation, and occasionally a place for post teaching-disaster counselling and gripe-fests (for myself and them).

The following year I was a part of a school that was at capacity due to a reshuffle of language programs. Myself and two other teachers were assigned to an office in the coffee room. Not the staff room mind you...the coffee room. Like my previous experience, having a couple of people to bounce things off of and help out was hugely helpful for me and, I hope, for them. The other advantage was that since we were teaching in other people's classrooms being at capacity, it frequently displaced other teachers to our Nomad's Hut...sorry, coffee room...to share their wisdom with us just starting out. Nomad's Hut was what I preferred even if other staff liked Cart People as our nickname(even though my cart was predominantly digital).

To any administrators reading this blog, please keep my experience in mind as I attribute this peer support experience to keeping me in the profession. Designing spaces to make people interact, and yes to occasionally come into conflict, is something that should be included in any plan involving new teachers. A quick shout out to @principalwise who was our fearless leader at the time and who, intentionally or not, spurred the development of these real world skills in a handful of her young teachers. I, for one, thank you for it Michelle.

The conclusion to all of this is that through technology, and good instructional and behavioral design, we can make sure that our students, and our developing teachers, can harness real world skills to not only survive but to thrive in challenges that may be impossible for somebody in a traditional learning or teaching environment.


Cheers, and enjoy the summer coffee detox. (Says the teacher still writing a blog after midnight in July)

Monday, July 20, 2015

On Arduino

Wow, so much for a post a day.

Life...right?


Anyways, I have made some progress on fleshing out one of the units that I feel I did badly this year and wanted to improve upon in the coming campaign. That unit was the introduction to Ardunio programming.

The awkward part of using the Arduino system is that it is quite new and many people disagree on how exactly to teach it to beginners. Some methods focus almost fully on teaching code, such as Arduino.cc 's tutorials. Other methods focus instead on hardware integration with no small amount of electronics such as Adafruits tutorials.

Since I have to blend this in my room I decided to focus on the software first and then work specific pieces of hardware into the curriculum when we embarked upon our robotics challenges.

sparkfun.com
The Arduino portion of the unit is meant to be used by students after they have completed CODE.ORG 's Accelerated Introduction to Computer Science Course.

This course is a great introduction to coding concepts and it can be administrated from a teacher account by having students add the teacher's course code before they start working.

It is advertised as a 20 hour introductory course, but I often selectively skip the unplugged activities and focus on the code-building. This course typically takes a motivated tenth grader no more than five classes (~7 hours) to complete.


The Arduino portion's theory is beginning to come together and can be found in the following links:


As always, feedback is appreciated. I will post more presentations as they are completed and plan on also posting the full unit plan including assignments.

Thursday, July 2, 2015

On Introductory Robotics

I realized tonight that I have begun to assemble resources and materials for the coming school-year without giving much of an overview of what it is I will be actually teaching so here is part 1: Robotics - Introductory Level

In introductory robotics, students are exposed to a wide variety of topics in robotics, mechatronics and engineering. A typical semester includes the following modules and credits.

ELT 1010 - ELECTRICAL ASSEMBLY 1

In this unit students are introduced to the fundamentals of electricity and safe work practices. They will learn to solder electronics components and will review the fundamental concepts involved with working on electronic circuits such as resistance, capacitance, inductance and electromagnetism.

DES 1050 - CAD 1

Using AutoDesk’s AutoCAD software as well as AutoDesk Inventor, students will learn the fundamentals of Computer Assisted Design and Drawing. They will apply these skills in a variety of design-oriented assignments that will lead them to producing portfolio-ready drawings. The skills they learn in this unit will then be applied to rapid prototyping with the lab’s 3D printer.

ELT 1910  - ELT PROJECT CREDIT A

Students will have the chance to learn a variety of system control methods and documentation for those systems as they explore the FESTO Didactic electropneumatic learning system. This system allows students to learn a variety of concepts in both manual and automatics electrical and pneumatic controls frequently used across the manufacturing sector.

CSE 1110 - STRUCTURED PROGRAMMING 1
(CSE 1240- ROBOTICS PROGRAMMING 1 for students already enrolled in Computer Science)

The Arduino programmable microcontroller is an up and coming technology that allows students to experiment with programming while seeing the results of their programming control their electronics from the Electrical Assembly unit. The system uses a variety of hardwares including the Arduino Uno and Redbot Mainboard as well as CODE.ORG to teach the basics of coding.

ELT 1130 and ELT 1140 - ROBOTICS 1 and ROBOTICS APPLICATIONS 1

Each robotics semester concludes with an overarching project that brings all of the technical and design elements that students have learned through the year. This challenge could involve an autonomous robot challenge such as RobotSumo or a remote control challenge that includes a more significant design component. This year it will likely be in the form of an autonomous challenge and a direct control challenge(either tethered or IR)


So there you have it, my upcoming semester in a nutshell. I will be updating this blog with notes and planning from all of these credits as the summer goes on.

In case anyone is wondering, anything I have created and posted here is free game for your classroom under a Creative Commons licence. Have at any of it and make sure to comment on any improvements that you make to it.


.

On Condensing ELT 1010

A couple of years ago a colleague mentioned that it would be great if we had a pre-made module for ELT 1010, an Alberta Ed. Career and Technology Studies (CTS) course that is a prerequisite for almost everything that I do in Robotics.
cartoon from xkcd.com

I've taken the liberty to summarize the curriculum using the major outcomes:

1. create a health and safety plan with special emphasis on conditions and factors related to the specific pathway or series of courses.
2. research common processes and methods of hazard identification, assessment and control specific to the pathway or series of courses.
3. apply the appropriate fabrication techniques, including proper soldering and component assembly procedures, to construct and test a simple electronic circuit.
4. apply the appropriate fabrication techniques to construct and test an electromagnetic device.
5. identify and assemble common electrical/electronic cables and connectors used in power, audio and video connections.
6. demonstrate established laboratory procedures and safe work practices
7. demonstrate basic competencies.
8. make personal connections to the cluster content and processes to inform possible pathway choices.

To this end, I will be putting parts of this module together in the following order and am happy to share what I have
in hopes that it might make someone else's life more simple as they step into the realm of teaching robotics.

  • Lab Safety
    • Powerpoint (Feel free to check the link and send feedback)
    • Lab Tour
    • Safety Quiz (minimum 80% on safety quiz to participate in course)

  • Basic Electrical Theory (to run concurrently with soldering due to lack of soldering irons)
    • Circuits, Ohm's Law, AC vs DC current
    • How to measure voltage (Multimeter use)
  • Soldering Basics (to run concurrently with electrical basics due to lack of soldering irons)
    • Soldering safety, terminology and workstation setup demo.
    • Soldering Activity(LED Light Board)
  • Electronics teardown
    • Students will be presented with an old electronic device from the recycling. They must:
      • Disassemble it.
      • Identify and photograph the major components (there will be support for this).
      • Put together a presentation on how those basic components work.
  • Final unit summary and review
    • Final quiz
    • Employability and Work Habits assessment (self and teacher assessed)


This module is meant to be a quick introduction and as I develop more than the safety presentation I will toss them up here.

For those interested in the theory portion, it will be drawing heavily from Sparkfun Electronics' online resources. (The linked page is just the tip of the iceberg)

I will also be using Collin Cunningham's wonderful, and slightly awkward, Youtube Videos

Feel free to comment if you know of any resources in the vein that could be helpful.

Tuesday, June 30, 2015

On Starting the Three D'sL Drawing Drafting and Design (DES 1050 Planning)

The first step towards developing my Robotics curriculum for this year has been at creating a way to teach AutoCAD.

The full credit description can be found here under DES1050 CAD 1.

Why AutoCAD? Because it is a very useful tool for documenting designs and planning robots. Our school board has always had a licence and now any student or educational institution can download a free 3-year licence, sweet.

It is a great place to begin as it quickly identifies shortcomings in mathematical ability that should be remedied early if students are to function in Robotics.

On my first attempt at teaching AutoCAD last year I identified two major shortcomings:

- I presented my theory via a great resource, myCADSite.com. This site is great, but it didn't connect with my learners at all being full of words and not pictures.

- I limited them to 2D models in AutoCAD which they quickly circumvented and wandered into 3D..

In short, we have to ask "will it blend?" Of course I don't mean this literally, but I do intend on doing a blended learning environment properly for this portion of my class.

Also, we will be venturing into using the most basic functions of AutoCAD Inventor in this unit.

From a logistics perspective I will have 8 computers available for this unit and nearly 30 students in the classroom; this unit will need to run itself as I will have 4 projects on the go during this unit with all of those kids and limited resources in the areas I want them to cover.

To this end, here is the overview of the video lessons that will be presented for this unit. They will be presented in video form with a maximum length of 5 minutes, If a lesson can't be taught in less than 5 minutes of tutorial, it will be split into multiple lessons.

Lesson 1:
Navigation of the drawing (select, zoom, pan)
First commands(LINE, CIRCLE, RECTANGLE)
Cartesian Coordinates
Absolute Coordinates
Relative Coordinates
Polar Coordinates

Lesson 2:
Creating Layers
Drawing Dimensions
Using the Model and Layout views
Saving as a PDF

Lesson 3:
Using OSnaps
TRIM/EXTEND
FILLET/CHAMFER
OFFSET

Lesson 4:
MOVE/COPY
MIRROR
STRETCH
ROTATE

Lesson 5:
Intro to Inventor

Each lesson will be designed to relate to a specific assignment that allows the students to demonstrate their knowledge of the tools in AutoCAD.

They will end up with five final drawings, each worth 19% of their final grade in this module(which will be designed to take approximately 14 hours to complete).

The next two weeks will be filled with me recording these lessons.

I'll post them as soon as they are complete.

On Beginning Again

I have tried blogging on and off since university when we encouraged to keep a blog of our work through teaching school at the University of Calgary.
Though it has fallen off of my radar due to the sheer insanity that is the workload inherent for beginning teachers, I want to keep a record of my development through the next 12 months.

This school year will see me teach classes in the areas of Medical Studies and Robotics at the high school level. I will be chronicling all of my lesson plans, developments, thoughts and feelings on those subjects here.

This work isn't intended for an audience beyond myself; that being said, if any teachers out there find it of benefit, I implore you to use whatever you would like.